[Server 샘플 링크] : https://github.com/leewoopyo/ssl_sample/tree/master/ssl_sample_server
GitHub - leewoopyo/ssl_sample
Contribute to leewoopyo/ssl_sample development by creating an account on GitHub.
github.com
[Client 샘플 링크 : https://github.com/leewoopyo/ssl_sample/tree/master/ssl_sample_client
GitHub - leewoopyo/ssl_sample
Contribute to leewoopyo/ssl_sample development by creating an account on GitHub.
github.com
1. Server 프로젝트 생성
Spring Boot 프로젝트 생성 : https://woopi1087.tistory.com/51
[Spring Boot] 프로젝트 생성 및 시작하기 (Visual Studio Code)
● Visual Studio Code에서 Spring Boot 프로젝트 빠른 생성 방법 아래 사이트 참조↓ 참조 : https://spring.io/quickstart Spring Quickstart Guide You will build a classic “Hello World!” endpoint which..
woopi1087.tistory.com
2. Server 쪽 소스 작성(맨 위 링크 참고)
package com.example.ssl_sample_server.api.controller;

import java.util.HashMap;
import java.util.Map;

import org.slf4j.Logger;
import org.slf4j.LoggerFactory;
import org.springframework.http.ResponseEntity;
import org.springframework.web.bind.annotation.GetMapping;
import org.springframework.web.bind.annotation.RequestMapping;
import org.springframework.web.bind.annotation.RequestParam;
import org.springframework.web.bind.annotation.RestController;

@RestController
@RequestMapping("/api/server/ssl")
public class SslController {

  private Logger log = LoggerFactory.getLogger(SslController.class);

  @GetMapping(value = "/test")
  public ResponseEntity<?> sample(@RequestParam String echoParam) {

    log.info("================== call_api ==================");

    //응답 데이터 구성
    Map<String, String> responseMap = new HashMap<String, String>();
    responseMap.put("echoParam", echoParam);

    return ResponseEntity.ok().body(responseMap);
  }
}
소스 적용 후 spring 기동 (vscode 기준 단축키 F5)
기동 화면(vscode)

서버가 잘 기동 되었나 확인하기 위해서 cmd에서 curl로 기동한 api 호출
curl -v http://localhost:8080/api/server/ssl/test?echoParam={parameter}
정상 응답 확인


3. 리눅스 서버에 해당 application 업로드 및 실행
해당 프로젝트 빌드
vscode 터미널 창에서 ./mvnw clean install -DskipTests --> war 파일 생성
프로젝트 디렉토리 안에 target 디렉토리가 생성되고 그 안에 war파일이 생성됨


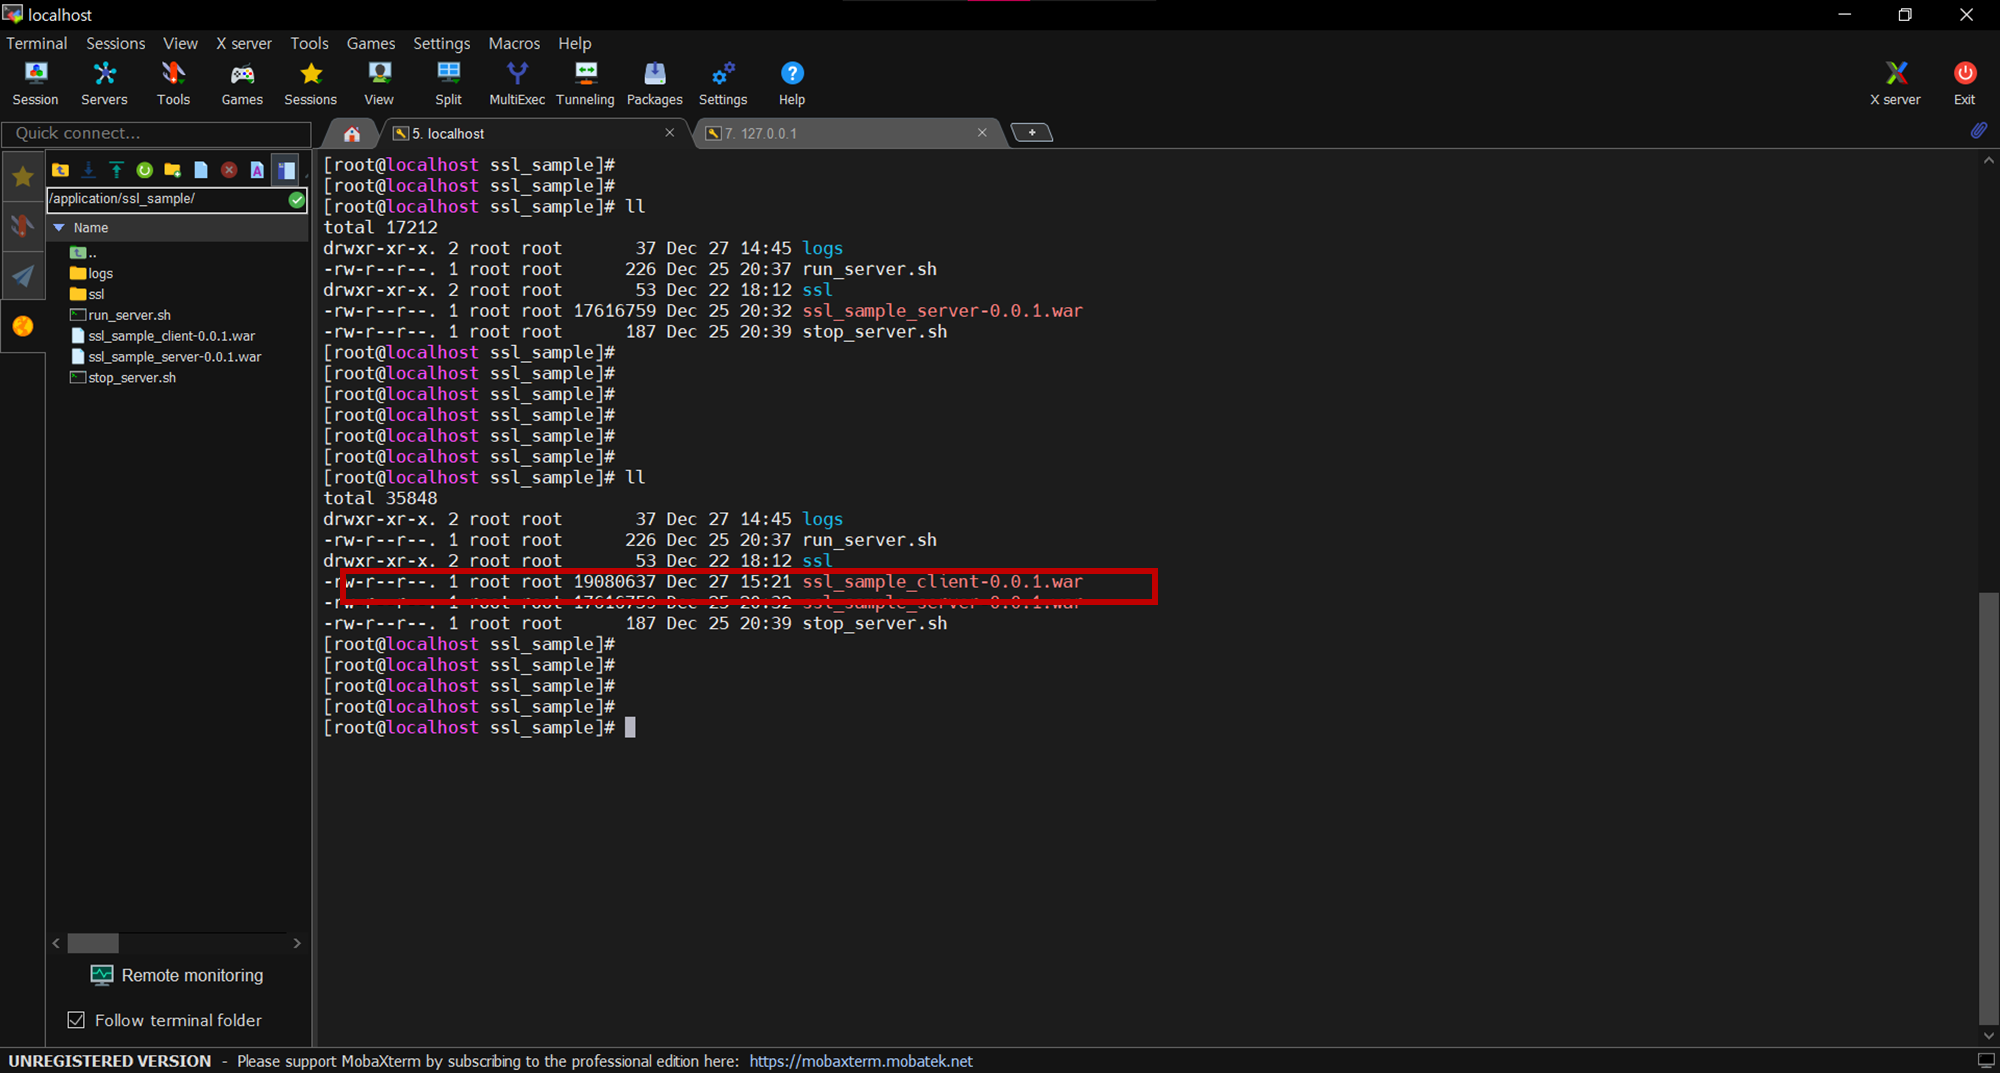
생성된 war파일을 리눅스 서버 /application/ssl_sample 경로에 업로드 (mobaXterm이 파일 업로드 기능을 가지고 있음)

실행 과 종료, 로그를 원할하게 확인하기 위해서 다음과 같은 스크립트 생성
vi run_server.sh (어플리케이션 실행 및 로그 실행, 파일 생성)
#! bin/sh

export APP_NAME="/application/ssl_sample/ssl_sample_server-0.0.1.war"
export LOG_FILE="/application/ssl_sample/logs/server_log_$(date '+%Y%m%d').log"

nohup java -jar $APP_NAME >> $LOG_FILE &

tail -0f $LOG_FILE &
vi stop_server.sh (어플리케이션 종료, 로그 종료)
#! bin/sh

ps -ef | grep java | grep ssl_sample_server | grep -v grep | awk '{print $2}' | xargs kill

ps -ef | grep tail | grep server_log | grep -v grep | awk '{print $2}' | xargs kill
추가로 mkdir /application/ssl_sample/logs 입력

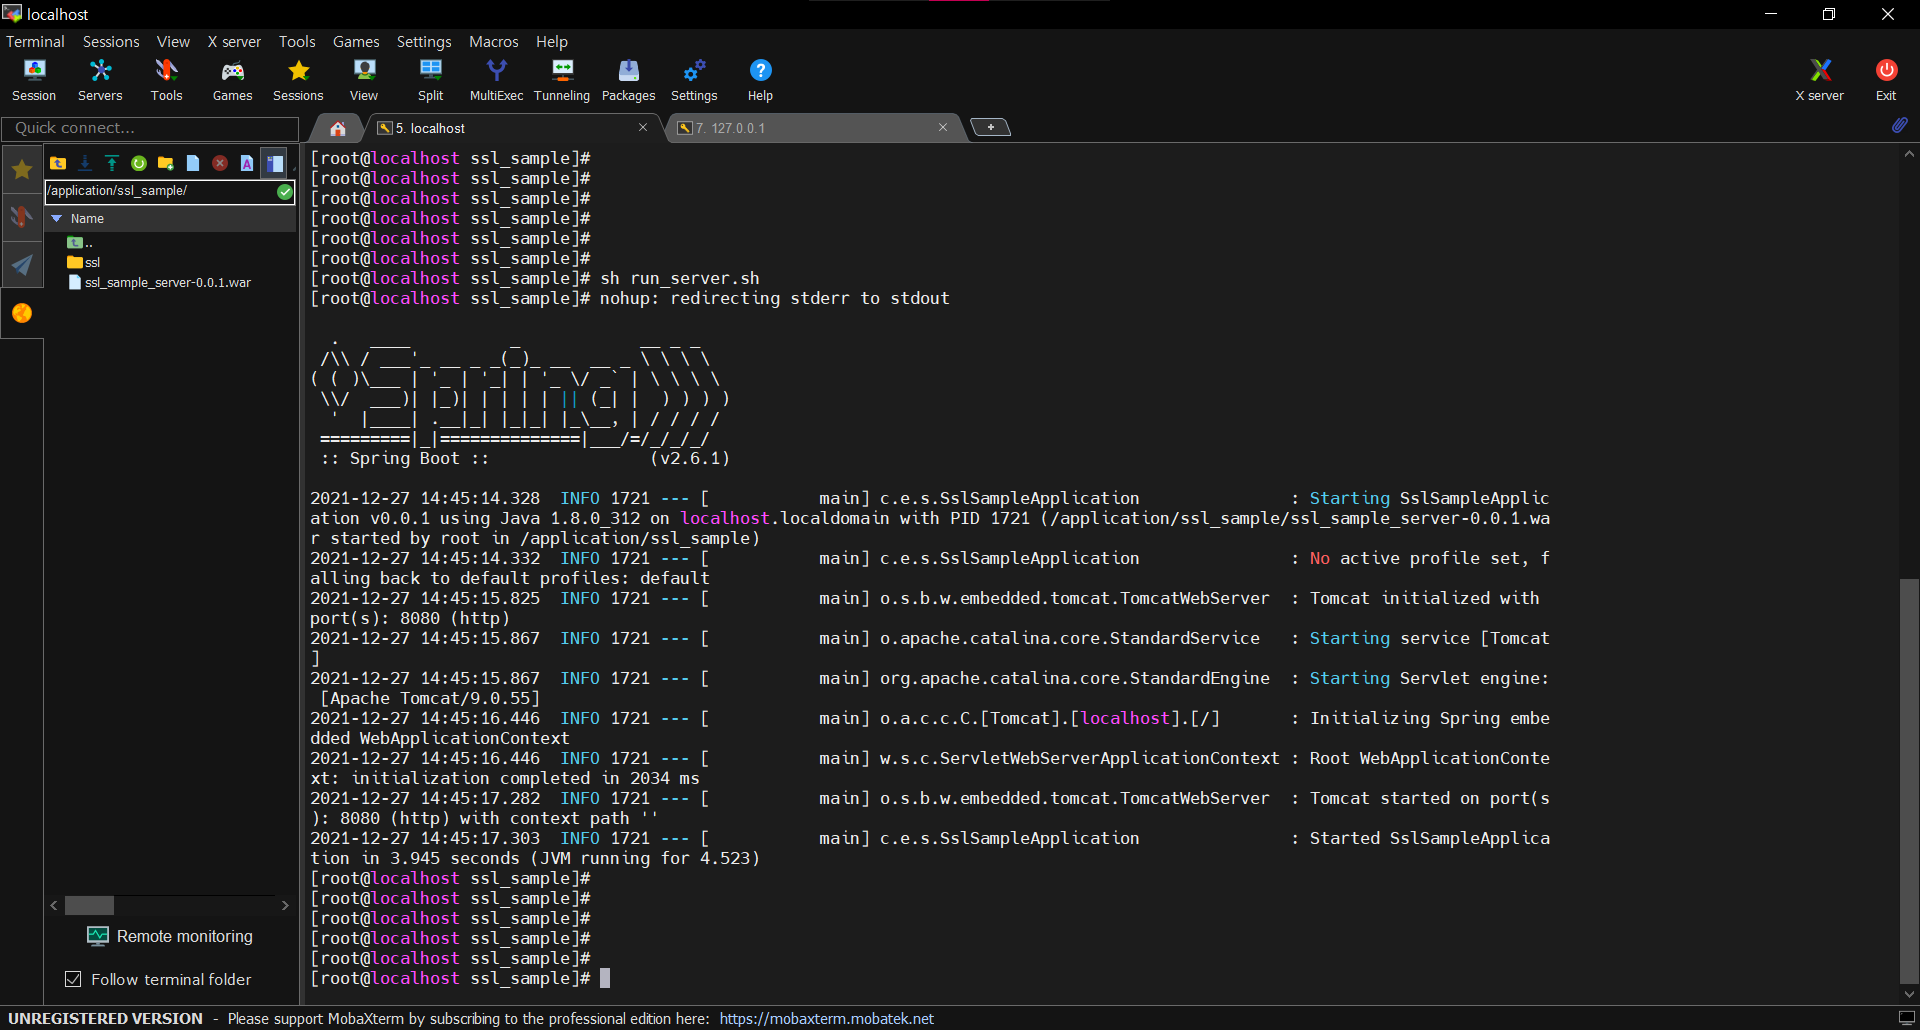
sh run_server.sh 로 실행
실행 화면

리눅스 서버에서 curl -v http://mylocal.test.com:8080/api/server/ssl/test?echoParam=test12345 입력하여 서버 테스트
로그 및 정상 응답 확인

4. Client 프로젝트 생성 및 소스 작성 (맨 위 링크 참고)
client 쪽 소스
pom.xml에 apache httpclient 라이브러리 추가
<dependency>
	<groupId>org.apache.httpcomponents</groupId>
	<artifactId>httpclient</artifactId>
	<version>4.5.13</version>
</dependency>
java 소스 작성
package com.example.ssl_sample_client.api.client;

import org.apache.http.Header;
import org.apache.http.HttpEntity;
import org.apache.http.client.methods.CloseableHttpResponse;
import org.apache.http.client.methods.HttpGet;
import org.apache.http.impl.client.CloseableHttpClient;
import org.apache.http.impl.client.HttpClients;
import org.apache.http.util.EntityUtils;
import org.springframework.http.HttpHeaders;
import org.springframework.web.bind.annotation.GetMapping;
import org.springframework.web.bind.annotation.RequestParam;
import org.springframework.web.bind.annotation.RestController;

@RestController
public class HttpClient {

  @GetMapping(value = "/api/client/ssl/test")
  public void httpCall(@RequestParam String clientValue) {

    CloseableHttpClient httpClient = HttpClients.createDefault();

    try {
      //요청 주소 세팅
      String url = "http://mylocal.test.com:8080/api/server/ssl/test?echoParam=" + clientValue;
      System.out.println("=== url ===\n" + url);
      HttpGet request = new HttpGet(url);

      //Header 값 세팅
      request.addHeader("custom-key","wplee");
      request.addHeader(HttpHeaders.USER_AGENT,"Googlebot");

      //Http 요청
      CloseableHttpResponse response = httpClient.execute(request);

      //응답 결과 출력
      try {
        System.out.println("Protocol Verstion   : " + response.getProtocolVersion());                // Protocol Version : HTTP/1.1
        System.out.println("Status Code         : " + response.getStatusLine().getStatusCode());     // Status Code : 200
        System.out.println("Status Message      : " + response.getStatusLine().getReasonPhrase());   // Status Message : OK
        System.out.println("Status              : " + response.getStatusLine().toString());           // HTTP/1.1 200 OK

        for (Header header : response.getAllHeaders()) {
          System.out.println("Http_Header_Name    : " + header.getName());
          System.out.println("Http_Header_Value   : " + header.getValue());
        }

        HttpEntity httpEntity = response.getEntity();
        if (httpEntity != null) {
          String result = EntityUtils.toString(httpEntity);
          System.out.println("=== result === \n" + result);
        }

      } catch (Exception e) {
        System.out.println("Exception #1");
        e.printStackTrace();
      }

    } catch (Exception e) {
      System.out.println("Exception #2");
      e.printStackTrace();
    }

  }

}
application.properties파일을 application.yml 바꾼다음 다음과 같이 추가 (기동 포트 변경)
server:
  port: 8081
5. 빌드, 리눅스 서버에 업로드 및 실행
vscode 터미널 창에서(혹은 cmd 창 띄워서) ./mvnw clean install -DskipTests 입력 (프로젝트 빌드)

프로젝트 안에 target 안에 생긴 war파일을 리눅스 서버의 /application/ssl_sample 디렉토리에 업로드


프로젝트를 용이하게 실행 및 로그 분석하기 위해 추가 스크립트 작성
vi run_client.sh
#! bin/sh

export APP_NAME="/application/ssl_sample/ssl_sample_client-0.0.1.war"
export LOG_FILE="/application/ssl_sample/logs/client_log_$(date '+%Y%m%d').log"

nohup java -jar $APP_NAME >> $LOG_FILE &

tail -0f $LOG_FILE &
vi stop_client.sh
#! bin/sh

ps -ef | grep java | grep ssl_sample_client | grep -v grep | awk '{print $2}' | xargs kill

ps -ef | grep tail | grep client_log | grep -v grep | awk '{print $2}' | xargs kill
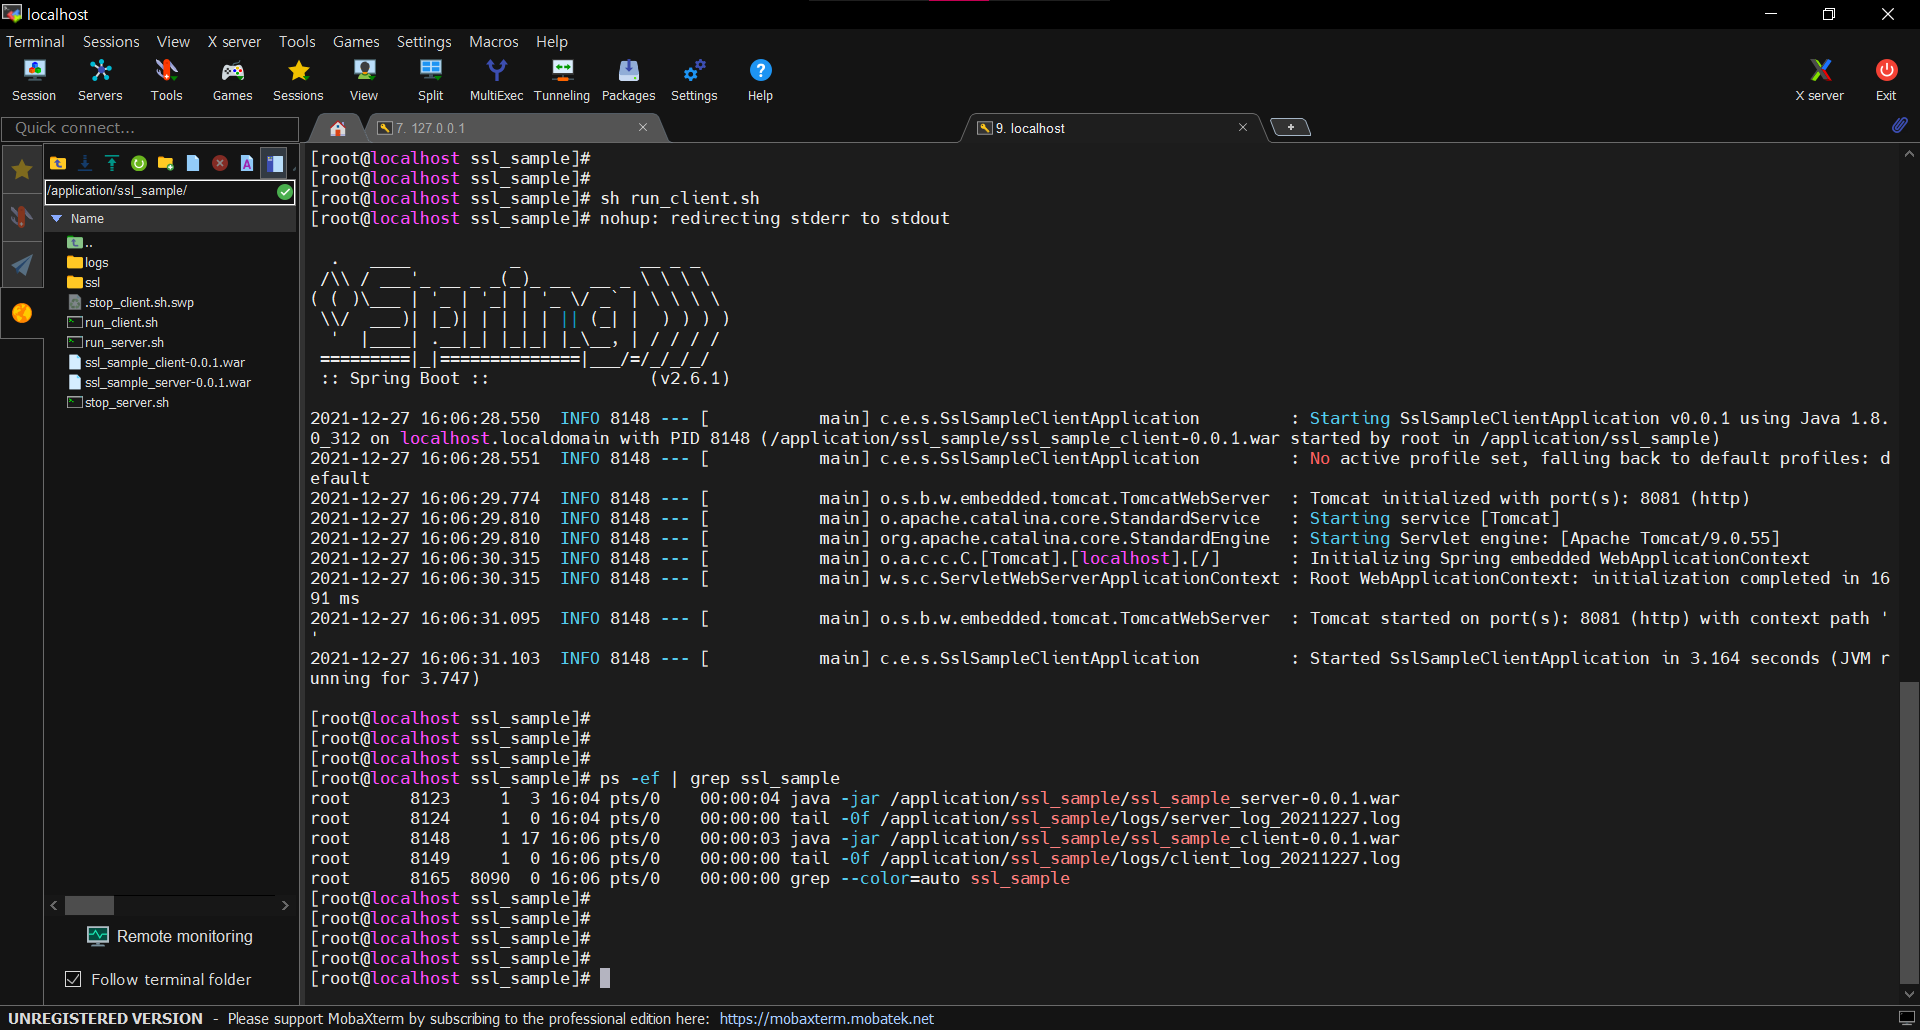
sh run_client.sh 로 실행
정상 기동 확인

6. Client ~ Server 통신 테스트
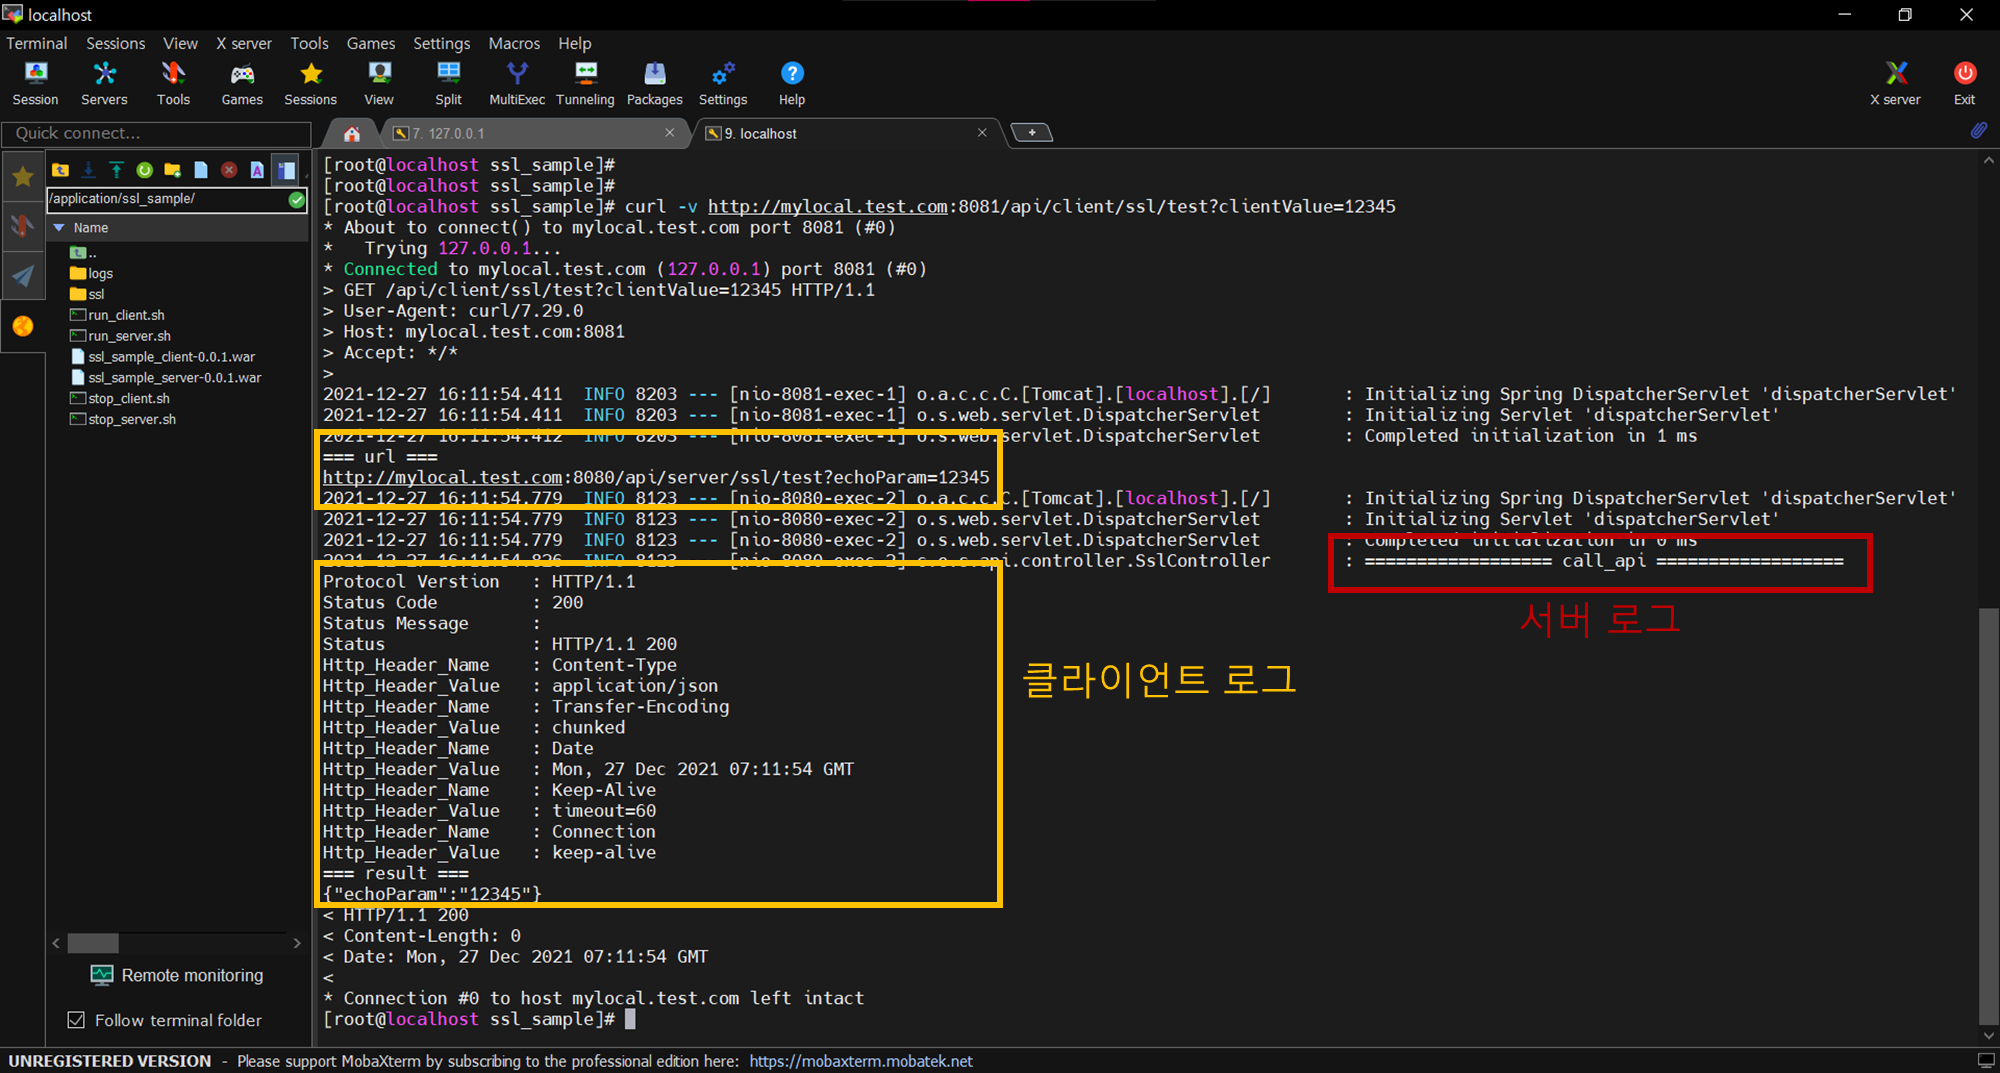
curl -v http://mylocal.test.com:8081/api/client/ssl/test?clientValue=12345
통신 확인

'네트워크' 카테고리의 다른 글
| [DNS] 가비아에서 도메인 구입 (0) | 2024.03.02 |
|---|---|
| [SSL, TLS] SSL, TLS 이란 (0) | 2021.12.29 |
| [SSL_Sample] 3. 어플리케이션에 SSL 적용 (0) | 2021.12.29 |
| [SSL_Sample] 1. keystore 생성 (0) | 2021.12.22 |
| [SSL_Sample] 0. SSL 통신을 위한 테스트 준비 (0) | 2021.12.22 |